Use OneDrive API to upload files to Office 365 Sharepoint Site

I have automated uploading files from my web site host’s server to my Office 365 Sharepoint site using scheduled cron jobs running Python scripts on my web host.

The Python scripts use Microsoft’s Azure Active Directory Library (ADAL) to authenticate off Azure Active Directory (Azure AD or ADD), and  OneDrive API and Python Requests to use the authentication to upload the files to Sharepoint from my web host.

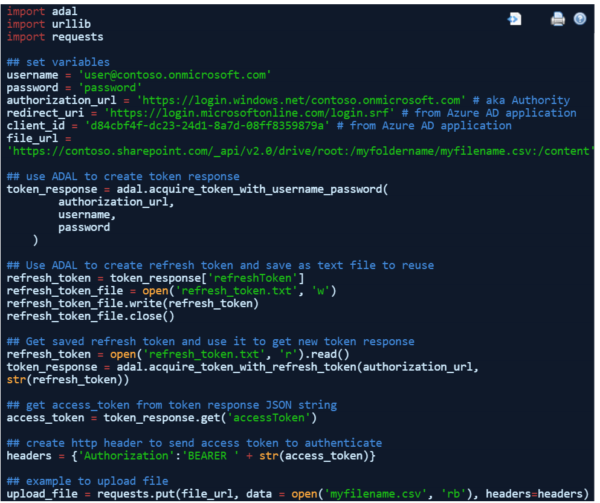
Here is the code

import adal
import urllib
import requests

## set variables
username = '[email protected]'
password = 'password'
authorization_url = 'https://login.windows.net/contoso.onmicrosoft.com' # aka Authority
redirect_uri = 'https://login.microsoftonline.com/login.srf' # from Azure AD application
client_id = 'd84cbf4f-dc23-24d1-8a7d-08ff8359879a' # from Azure AD application
file_url = 'https://contoso.sharepoint.com/_api/v2.0/drive/root:/myfoldername/myfilename.csv:/content'

## use ADAL to create token response
token_response = adal.acquire_token_with_username_password(
        authorization_url,
        username,
        password
    )

## Use ADAL to create refresh token and save as text file to reuse
refresh_token = token_response['refreshToken']
refresh_token_file = open('refresh_token.txt', 'w')
refresh_token_file.write(refresh_token)
refresh_token_file.close()

## Get saved refresh token and use it to get new token response
refresh_token = open('refresh_token.txt', 'r').read()
token_response = adal.acquire_token_with_refresh_token(authorization_url, str(refresh_token))

## get access_token from token response JSON string
access_token = token_response.get('accessToken')

## create http header to send access token to authenticate
headers = {'Authorization':'BEARER ' + str(access_token)}

## example to upload file
upload_file = requests.put(file_url, data = open('myfilename.csv', 'rb'), headers=headers)


There are many things to consider when working with Microsoft’s APIs to work with its online services such as Office 365.

The first is how to authenticate. Microsoft is trying to move everyone to use Azure AD to do oAuth authentication. Microsoft services still have their own authentication methods but this exercise I used Azure AD.

The second is what API to use. Microsoft has recently released their Graph API that is ‘one endpoint to rule them all’. However Microsoft services still have their own API’s so while Graph API looks tempting for this exercise I used the OneDrive API.

Azure AD Authentication

The authentication will be done in two parts.

  1. Create Azure AD application to do the authentication for the Microsoft service(s) you want to interact with.
  2. Use ADAL to interact with Azure AD to do the oAuth flow.

Setup Azure AD – create application

Microsoft provides free use of Azure AD for light authentication needs. You can register and create account. Once you have your account you need to create a new application.

For my purposes I created an Azure AD native client application. Azure AD also has web application and web APIs but both require user to enter username and password in web browser. The native client application does technically also require user to enter these too but I hacked past this by using ADAL user authentication and hard coding username and password into the Python code. Since these are going onto my web host in protected directory to run as cron jobs they will be safe.

I am not going to go through the detail of creating an Azure AD application there are some good blog posts and Microsoft does good job of describing it. For example take a look at this site which has decent information about creating a new Azure AD application.

The Azure AD applications allow you to choose which Microsoft services it will be used to authenticate. Confusingly these are also called ‘applications’ too. They are represent Microsoft Services such as Office 365 Sharepoint Online, OneNote, Power BI, etc and is the place where you assign the permissions (also called ‘scopes’) that authentication will allows with that Microsoft service.

An Azure AD application might provide authentication for more than one Microsoft Service. But my native client application has only Windows Azure Active Directory permissions (which are there by default) and Office 365 Sharepoint Online permissions set to Read and write user files and Read and write items in all site collections.

After you have created your client application make sure to copy the client_id and resource_uri to use in code below. The client_id is automatically assigned and the resource_uri for a native client app can be any url and is just a unique identifier. I chose the Office 365 login url. The web applications need a real url because that is where the user will be prompted to enter credentials.

Azure Active Directory Library (ADAL)

Microsoft’s Azure Active Directory Library (ADAL) authentication libraries are created for developer’s to use with Azure AD. I used the ADAL Python SDK which was easily installed with pip install adal. 

The oAuth authentication flow can seem very complex but you don’t have to worry about that if you use ADAL. ADAL uses your Azure AD application credentials (client_id, resource_uri in case of native client application) to retrieve a token response which is a text string in JSON format.

This JSON string includes the actual access token that is used to authenticate accessing Sharepoint and upload the files. You can use Python to retrieve the access token (it is a Dictionary). Then you simply put the access token into a header that will be used in the Put Request as the method of passing the access token to the OneDrive API.

ADAL also takes care of refreshing tokens which expire. In my case where the scripts are running on the server as cron jobs I want the token to refresh automatically. ADAL gets a refresh token that you can save to get a new access token when previous one expires. I actually write the refresh token to a text file on the server and refresh the access token each time code is run. I could only refresh it if the previous one expires.

OneDrive API

The OneDrive API has different configurations depending on whether you are using it to access a OneDrive Personal, OneDrive Business or Sharepoint Online account.

Be warned that the documentation for OneDrive API can be very dense and there are different ways of presenting required syntax to identify interactions. Of course the representations vary with different SDKs too.  Also there are different versions of Microsofts file storage services over the years. So I recommend to focus on the newest OneDrive API and make sure you are looking at documentation relevant to newest version.

The Gotchas

ADAL Default Values

ADAL has default client_id and resource values that it uses for the username authentication. I changed these default values to match my Azure AD application.

Before changing these I was getting an Invalid audience Uri error

{“error”:”invalid_client”,”error_description”:”Invalid audience Uri ‘https:\/\/m
anagement.core.windows.net\/’.”}

This error means the url being used to create the token response was not same as the one that the file was being uploaded to.

EDIT August 21, 2016 Microsoft has updated the ADAL library so that you can specify the client id and the resource value because authentication against different services needs different client id and resource endpoint urls. That means the hack I used below is no longer required. For more details seehttps://github.com/AzureAD/azure-activedirectory-library-for-python

In ADAL’s __init__.py file look for the class _DefaultValues class at bottom of code and replace the default values:

  • I changed client_id to my application’s client_id
  • I changed resource from https://management.core.windows.net/ to https://tenant.sharepoint.com/

The acquire_token_with_username_password function sets these to None so they get set to default values. So this could be changed so they accept values from the code.

Sharepoint Site and Folder Paths

The OneDrive API dev documentation https://dev.onedrive.com/getting-started.htm demonstrates the different service urls:

  • OneDrive – https://api.onedrive.com/v1.0
  • OneDrive for Business – https://{tenant}-my.sharepoint.com/_api/v2.0
  • SharePoint Online – https://{tenant}.sharepoint.com/{site-relative-path}/_api/v2.0

The {site-relative-path} notation indicates the Sharepoint site name. My site didn’t have this because it was default site. However you might have to add your site relative path.

Also the Sharepoint url for the file I was uploading looked like this:

https://contoso.sharepoint.com/Shared%20Documents/myfoldername/myfilename.csv

However you will note that the file_url in the code doesn’t make any reference to the Shared%20Documents:

https://contoso.sharepoint.com/_api/v2.0/drive/root:/myfoldername/myfilename.csv:/content


OneDrive API features

Microsoft has three file storage options:

    1. OneDrive Personal
    2. OneDrive Business
    3. Sharepoint

These have recently been unified into one new OneDrive API https://dev.onedrive.com and oAuth is preferred method of authentication.

However there are some key differences how the API:

    • OneDrive Personal authenticates against oAuth account created at Microsoft Application Registration Portal using a Microsoft account (Live, Microsoft.com). Authentication url is: https://login.live.com/oauth20_authorize.srf
    • OneDrive Business and Sharepoint authenticate against oAuth account created in Azure Active Directory and must be done with Office 365 account.  Authentication url is: https://login.microsoftonline.com/common/oauth2/

You can create two types of applications that will have different methods and parameters:

    • Web application – web site based application that user can sign into. Require definition of an active redirect url and definition of client secret. Scopes or permissions are identified on the fly when authentication is made.
    • Native client application – Android, ‘head-less’ server app, etc. Requires only definition of an unique redirect uri and scopes or permissions that Office 365 account / user have available eg read & write files, etc.

The process for authentication is similar:

    • Sign-in with user account/password or send authentication url to authentication server to get authentication code.
    • Server sends back url with authentication code.
    • Retrieve authentication code from url.
    • Send another url comprised of code and other parameters back to server to get tokens.
    • Use tokens to list, view, upload, download files etc.

There are development SDKs available for popular languages.

I was only interested in thePython SDK . Some key notes about it include:

    • It is created specifically for web applications, not native client applications. The SDK authentication method relies on using a web browser to pass urls with parameters, codes and tokens back and forth. A native client application will not use web browser. A work around was to use head-less browser but that is a bit hacky.
    • It only has OneDrive Personal authentication urls. To use this with OneDrive Business or Sharepoint these urls are easily replaced with the OneDrive Business authentication urls in two files: auth_provider.py and the onedrivesdk_helper.py.

The change to the unified OneDrive API and oAuth authentication only happened in late 2015 so this is pretty new.

There weren’t many well developed or well documented OneDrive Python example code available.

Note it is still also possible to work with OneDrive Business, Sharepoint and OneDrive Personal without using oAuth authentication and this new OneDrive API by simply using urllib, request and templating along with hard coded Office 365 username and password in your code to authenticate.

Finally Microsoft Graph API can be used to interact with OneDrive Business, Sharepoint and OneDrive Personal  once oAuth is setup.


Tracking Cuba Gooding Jr’s Twitter follower count

Happened to see Cuba Gooding Jr’s first tweet about 30 minutes or so after he created it.

Update: @cubagoodingjr is no longer active so not getting tweets from it any longer

At the time his profile said he had 559 followers. A few minutes later I refreshed his profile and saw the follower count had increased to 590 and every few minutes it kept increasing. By the end of the day he had about 4,000 followers.

I thought it would be interesting to track how his follower count changed going forward. So I used the Twitter API to get his follower count once per day, save the data, and then created a web page to visualize his follower count per day.

cubatweet

After 2 days Cuba had about 7,000 followers which averaged out to about 175 new followers per hour.  However, the number of new followers slowed down quickly to 30 or so new followers per day and after about 3 months he only gets about 10 new followers per day.  In fact, some days, he has net loss of followers, eg more people unfollow than him, than new follows on that day.

For the technically inclined, I setup an automatic retrieval of Cuba’s Tweets using Twitter’s API and the Tweepy Python module scheduled to run daily using a cron job.

The follower counts get put into a database. I created a PHP web page application to retrieve the data from the database, and create a web page that includes the Google Charts API to create a simple line chart to show Cuba’s regularly updated follower count by day.

You can get the cron job and PHP web page code from my  Github repository. 

If you want to run this code yourself you will need a Twitter developer account and an OAuth file.

Dell ecommerce web site scraping analysis

Once upon a time, I needed to find Dell monitor data to analyse.

A quick search brought me to their eCommerce web site which had all the monitor data I needed and all I had to do was get the data out of the website.

To get the data from the website I used the Python and Python module Scrapy to scrape the webpage and write data to a csv file.

Based on the data I got from the site the counts of monitors by size and country are presented below.


However this data is probably not accurate. In fact I know it isn’t. There was a surprising number of variances in the monitor descriptions including screen size which made it hard to get quick accurate counts. I had to do some data munging to clean up the data but there is still a bit more to do.

The surprising thing is that there do not appear to be specific data points for each of the monitor descriptions components. This website is being generated from a data source likely a database that contains Dell’s products. This database does not appear to have fields for each independent data point that are used to categorize and describe Dell monitors.

The reason I say this is that the monitor descriptions single string of text. Within the text string are things like the monitor size, model, common name, and various other features.

These are not in same order, do not all have same spelling, format such as use of text separators, lower or upper case.

Most descriptions are formatted like this example:

Dell UltraSharp 24 InfinityEdge Monitor – U2417H”.

However the many variations on this format at listed below. There is obviously no standardization for Dell to enter monitor descriptions for their ecommerce site.

  • Monitor Dell S2240T serie S 21.5″
  • Dell P2214H – Monitor LED – 22-pulgadas – 1920 x 1080 – 250 cd/m2 – 1000:1 – 8 ms – DVI-D
  • Dell 22 Monitor | P2213 56cm(22′) Black No Stand
  • Monitor Dell UltraSharp de 25″ | Monitor UP2516D
  • Dell Ultrasharp 25 Monitor – UP2516D with PremierColor
  • Dell 22 Monitor – S2216M
  • Monitor Dell UltraSharp 24: U2415
  • Dell S2340M 23 Inch LED monitor – Widescreen 60Hz Full HD Monitor

Some descriptions include the monitor size unit of measurement, usually in inches, sometimes in centimeters, and sometimes none at all.

Sometimes hyphens are used to separate description sections but other times the pipe character ( | ) is used to separate content. Its a real mish mash.

Description do not have consistent order of description components. Sometimes part number is after monitor size, sometimes it is elsewhere.

The problem with this is that customers browsing the site will have to work harder to compare monitors taking into account these variances.

I’d bet this leads to lost sales or poorly chosen sales that result in refunds or disappointed customers.

I’d also bet that Dell enterprise customers and resellers also have a hard time parsing these monitor descriptions too.

This did affect my ability to easily get the data to do analysis of monitors by description categories because they were not in predictable locations and were presented in many different formats.

Another unusual finding was that it looks like Dell has designated default set of 7 monitors to a large number of two digit country codes. For example Bhutan (bt) and Bolivia (rb) both have the same 7 records, as do many others. Take look at the count of records per country at bottom of page. Many countries have only 7 monitors.

Here is the step by step process used to scrape this data.

The screenshot below shows the ecommerce web site page structure. The monitor information is presented on the page in a set of nested HTML tags which contain the monitor data.

dell ecommerce screenshot

These nested HTML tags can be scraped relatively easily. A quick review revealed that the web pages contained identifiable HTML tags that held the data I needed. Those tags are named in Python code below.

The website’s url also had consistent structure so I could automate navigating through paged results as well as navigate through multiple countries to get monitor data for more than one Dell country in the same sessions.

Below is an example of the url for the Dell Canada eCommerce web site’s page 1:

https://accessories.dell.com/sna/category.aspx?c=ca&category_id=6481&l=en&s=dhs&ref=3245_mh&cs=cadhs1&~ck=anav&p=1

The only two variables in url that change for the crawling purposes are:

  • The “c” variable was a 2 character country code eg “ca” = Canada, “sg” = Singapore, “my” = Malaysia, etc.
  • The “p” variable was a number representing the count of web pages that a country’s monitors are shown on about 10 monitors per page. No country I looked at had more than 5 pages of monitors.

Dell is a multi-national corporation so likely has many countries in this eCommerce database.

Rather than guess what they are I got a list of two character country codes from Wikipedia that I could use to create urls to see if that country has data. As a bonus the Wikipedia list gives me the country name.

The Wikipedia country code list needs a bit of clean-up. Some entries are clearly not countries but some type of administrative designation. Some countries are listed twice with two country codes. For example Argentina has “ar” and “ra”. For practical purposes if the Dell url can’t be created from this country codes in this list then the code just skips to next one country code.

The Python code I used is shown below. It outputs a csv file with the website data for each country with the following columns:

  • date (of scraping)
  • country_code (country code entered from Wikipedia)
  • country (country name from Wikipedia)
  • page (page number of website results)
  • desc (HTML tag containing string of text)
  • prod_name (parsed from desc)
  • size (parsed from desc)
  • model (parsed from desc)
  • delivery (HTML tag containing just this string)
  • price (HTML tag containing just this string)
  • url (url generated from country code and page)

The code loops through the list of countries that I got from Wikipedia and within each country it also loops through the pages of results while pagenum < 6:.

I hard coded the number of page loops to 6 as no country had more than 5 pages of results. I could have used other methods perhaps looping until url returned 404 or page not found. It was easier to hard code based on manual observation.

Dell eCommerce website scraping Python code

#-*- coding: utf-8 -*-
import urllib2
import urllib
from cookielib import CookieJar

from bs4 import BeautifulSoup
import csv
import re
from datetime import datetime

countries={
    'AC':'Ascension Island',
    'AD':'Andorra',
    'AE':'United Arab Emirates',
     ... etc
    'ZM':'Zambia',
    'ZR':'Zaire',
    'ZW':'Zimbabwe'
}

def main():

    output = list()
    todaydate = datetime.today().strftime('%Y-%m-%d')
    
    with open('dell_monitors.csv', 'wb') as file:
        writer = csv.DictWriter(file, fieldnames = ['date', 'country_code', 'country', 'page', 'desc', 'prod_name', 'size', 'model', 'delivery', 'price', 'url'], delimiter = ',')
        writer.writeheader()
        
        for key in sorted(countries):
            country_code = key.lower()
            country = countries[key]
            pagenum = 1      
            while pagenum < 6:
                url = "https://accessories.dell.com/sna/category.aspx?c="+country_code+"&category_id=6481&l=en&s=dhs&ref=3245_mh&cs=cadhs1&~ck=anav&p=" + str(pagenum)
                #HTTPCookieProcessor allows cookies to be accepted and avoid timeout waiting for prompt
                page = urllib2.build_opener(urllib2.HTTPCookieProcessor).open(url).read()
                soup = BeautifulSoup(page)           
                if soup.find("div", {"class":"rgParentH"}):
                    tablediv = soup.find("div", {"class":"rgParentH"})
                    tables = tablediv.find_all('table')
                    data_table = tables[0] # outermost table parent =0 or no parent
                    rows = data_table.find_all("tr")
                    
                    for row in rows:
                        rgDescription = row.find("div", {"class":"rgDescription"})
                        rgMiscInfo = row.find("div", {"class":"rgMiscInfo"})
                        pricing_retail_nodiscount_price = row.find("span", {"class":"pricing_retail_nodiscount_price"})

                        if rgMiscInfo: 
                            delivery = rgMiscInfo.get_text().encode('utf-8')
                        else:
                            delivery = ''
                            
                        if pricing_retail_nodiscount_price:
                            price = pricing_retail_nodiscount_price.get_text().encode('utf-8').replace(',','')
                        else:
                            price = ''
                            
                        if rgDescription:
                            desc = rgDescription.get_text().encode('utf-8')
                            prod_name = desc.split("-")[0].strip()
                            try:
                                size1 = [int(s) for s in prod_name.split() if s.isdigit()]
                                size = str(size1[0])
                            except:
                                size = 'unknown'
                            try:
                                model = desc.split("-")[1].strip()
                            except:
                                model = desc
                                
                            results = str(todaydate)+","+country_code+","+country+","+str(pagenum)+","+desc+","+prod_name+","+size+","+model+","+delivery+","+price+","+url
                            
                            file.write(results + '\n')
                    
                    pagenum +=1
                else:
                    #skip to next country
                    pagenum = 6 
                    continue

                
if __name__ == '__main__':
    main()


The Python code scraping output is attached here as a csv file.

The summary is a list of the scraping output that shows a list of country codes, countries and count of Dell monitor records scraped from a web page using the country code Wikipedia had for these countries.

af – Afghanistan – 7 records
ax – Aland – 7 records
as – American Samoa – 7 records
ad – Andorra – 7 records
aq – Antarctica – 7 records
ar – Argentina – 12 records
ra – Argentina – 7 records
ac – Ascension Island – 7 records
au – Australia – 36 records
at – Austria – 6 records
bd – Bangladesh – 7 records
be – Belgium – 6 records
bx – Benelux Trademarks and Design Offices – 7 records
dy – Benin – 7 records
bt – Bhutan – 7 records
rb – Bolivia – 7 records
bv – Bouvet Island – 7 records
br – Brazil – 37 records
io – British Indian Ocean Territory – 7 records
bn – Brunei Darussalam – 7 records
bu – Burma – 7 records
kh – Cambodia – 7 records
ca – Canada – 46 records
ic – Canary Islands – 7 records
ct – Canton and Enderbury Islands – 7 records
cl – Chile – 44 records
cn – China – 46 records
rc – China – 7 records
cx – Christmas Island – 7 records
cp – Clipperton Island – 7 records
cc – Cocos (Keeling) Islands – 7 records
co – Colombia – 44 records
ck – Cook Islands – 7 records
cu – Cuba – 7 records
cw – Curacao – 7 records
cz – Czech Republic – 6 records
dk – Denmark – 23 records
dg – Diego Garcia – 7 records
nq – Dronning Maud Land – 7 records
tp – East Timor – 7 records
er – Eritrea – 7 records
ew – Estonia – 7 records
fk – Falkland Islands (Malvinas) – 7 records
fj – Fiji – 7 records
sf – Finland – 7 records
fi – Finland – 5 records
fr – France – 17 records
fx – Korea – 7 records
dd – German Democratic Republic – 7 records
de – Germany – 17 records
gi – Gibraltar – 7 records
gr – Greece – 5 records
gl – Greenland – 7 records
wg – Grenada – 7 records
gu – Guam – 7 records
gw – Guinea-Bissau – 7 records
rh – Haiti – 7 records
hm – Heard Island and McDonald Islands – 7 records
va – Holy See – 7 records
hk – Hong Kong – 47 records
in – India – 10 records
ri – Indonesia – 7 records
ir – Iran – 7 records
ie – Ireland – 7 records
im – Isle of Man – 7 records
it – Italy – 1 records
ja – Jamaica – 7 records
jp – Japan – 49 records
je – Jersey – 7 records
jt – Johnston Island – 7 records
ki – Kiribati – 7 records
kr – Korea – 34 records
kp – Korea – 7 records
rl – Lebanon – 7 records
lf – Libya Fezzan – 7 records
li – Liechtenstein – 7 records
fl – Liechtenstein – 7 records
mo – Macao – 7 records
rm – Madagascar – 7 records
my – Malaysia – 25 records
mv – Maldives – 7 records
mh – Marshall Islands – 7 records
mx – Mexico – 44 records
fm – Micronesia – 7 records
mi – Midway Islands – 7 records
mc – Monaco – 7 records
mn – Mongolia – 7 records
mm – Myanmar – 7 records
nr – Nauru – 7 records
np – Nepal – 7 records
nl – Netherlands – 8 records
nt – Neutral Zone – 7 records
nh – New Hebrides – 7 records
nz – New Zealand – 37 records
rn – Niger – 7 records
nu – Niue – 7 records
nf – Norfolk Island – 7 records
mp – Northern Mariana Islands – 7 records
no – Norway – 19 records
pc – Pacific Islands – 7 records
pw – Palau – 6 records
ps – Palestine – 7 records
pg – Papua New Guinea – 7 records
pe – Peru – 43 records
rp – Philippines – 7 records
pi – Philippines – 7 records
pn – Pitcairn – 7 records
pl – Poland – 4 records
pt – Portugal – 7 records
bl – Saint Barthelemy – 7 records
sh – Saint Helena – 7 records
wl – Saint Lucia – 7 records
mf – Saint Martin (French part) – 7 records
pm – Saint Pierre and Miquelon – 7 records
wv – Saint Vincent – 7 records
ws – Samoa – 7 records
sm – San Marino – 7 records
st – Sao Tome and Principe – 7 records
sg – Singapore – 37 records
sk – Slovakia – 23 records
sb – Solomon Islands – 7 records
gs – South Georgia and the South Sandwich Islands – 7 records
ss – South Sudan – 7 records
es – Spain – 10 records
lk – Sri Lanka – 7 records
sd – Sudan – 7 records
sj – Svalbard and Jan Mayen – 7 records
se – Sweden – 6 records
ch – Switzerland – 21 records
sy – Syrian Arab Republic – 7 records
tw – Taiwan – 43 records
th – Thailand – 40 records
tl – Timor-Leste – 7 records
tk – Tokelau – 7 records
to – Tonga – 7 records
ta – Tristan da Cunha – 7 records
tv – Tuvalu – 7 records
uk – United Kingdom – 35 records
un – United Nations – 7 records
us – United States of America – 7 records
hv – Upper Volta – 7 records
su – USSR – 7 records
vu – Vanuatu – 7 records
yv – Venezuela – 7 records
vd – Viet-Nam – 7 records
wk – Wake Island – 7 records
wf – Wallis and Futuna – 7 records
eh – Western Sahara – 7 records
yd – Yemen – 7 records
zr – Zaire – 7 records

Grand Total – 1760 records

Always remember to start Python Virtualenv

When learning to develop Django and Flask Python applications using virtual environment I did not know that I should activate the virtual environment before running the application. Well, more precisely, I did know the virtual env should be activated but rather I assumed it would be activated somehow auto-magically.

I was using MS Visual Studio 2015 RC and its new Python Tools which work fine by the way. One can install new Python/Flask/Django/etc modules via the IDE.

This was also the first time I was using Python virtual environment. I hadn’t previously done any Python web development. I had used Python for analytical purposes in files, command line and iPython but all of these used the ‘native’ operating system Python installation.

In MS VS 2015 RC, after Python Tools are installed, there are templates to create new Django or Flask projects, and one of the steps asks if I want to install virtual env or not.

So after a bit of search and read I realized virtual env is the way to go. Its better for many reasons to have a standalone Python environment for each new Python/Flask/Django project.

I just assumed that since I had created my new Python application with a virtual env that when I opened Visual Studio and started working on it, it would be in virtual environment by default somehow auto-magically.

But no, the virtual environment has to be activated manually each time the project is opened or before being able to interact with the project via web browser. So remember to activate your virtual env before running your Python/Flash/Django application.

What mislead me was that running the application without first activating the virtual environment can often be ok because the native operating system Python installation has the required modules, so application runs just fine.

But I ran into problems when after installing new Python modules only to see the application complaining that they weren’t available eg got error message in browser and command line from the server saying ‘no module named xxx’. This was confusing because I was thinking hey I just installed that.

So remember activating the virtual env before running the Python application is required. Now it is second nature to do this.

To activate the virtual env in Windows simply navigate to the ‘Scripts’ folder in your virtual env folder and run the ‘activate.bat’ file.

In command line enter ‘activate’ in that folder. Or you can enter the full path to the activate.bat from anywhere in command line.

You can easily see if virtual env has been started because when it is you will see ‘(env)’ at the start of the command line.

Then you can go back to your application folder with the ‘runserver.py’ (or whatever you call it) and then start the application!